
Is Halloween really even a THING without potion bottles and spell books? The answer is no...and if you've been lacking in this department with your Halloween decor, I'm here to help! ; )

My good friend Libby from the Cozy Coffin came to teach me and some other girls in my neighborhood the art of DIY spell books. We grabbed some cheapy hard bound books from the dollar store (I also had quite a few we never read at home as well) and got to work! We first decided what our books would look like. Did we want to re create one from a movie? Would it have animals on it? What would the theme be? This is the longest and hardest part for me. As soon as I know what theme...I'm OFF like a flash!
My first one would be Harry Potter themed. I thought it would be fun to make "Potions For Parseltongues". We are hoping to recreate Diagon Alley in our basement this year and this book would look AWESOME in the bookshop!
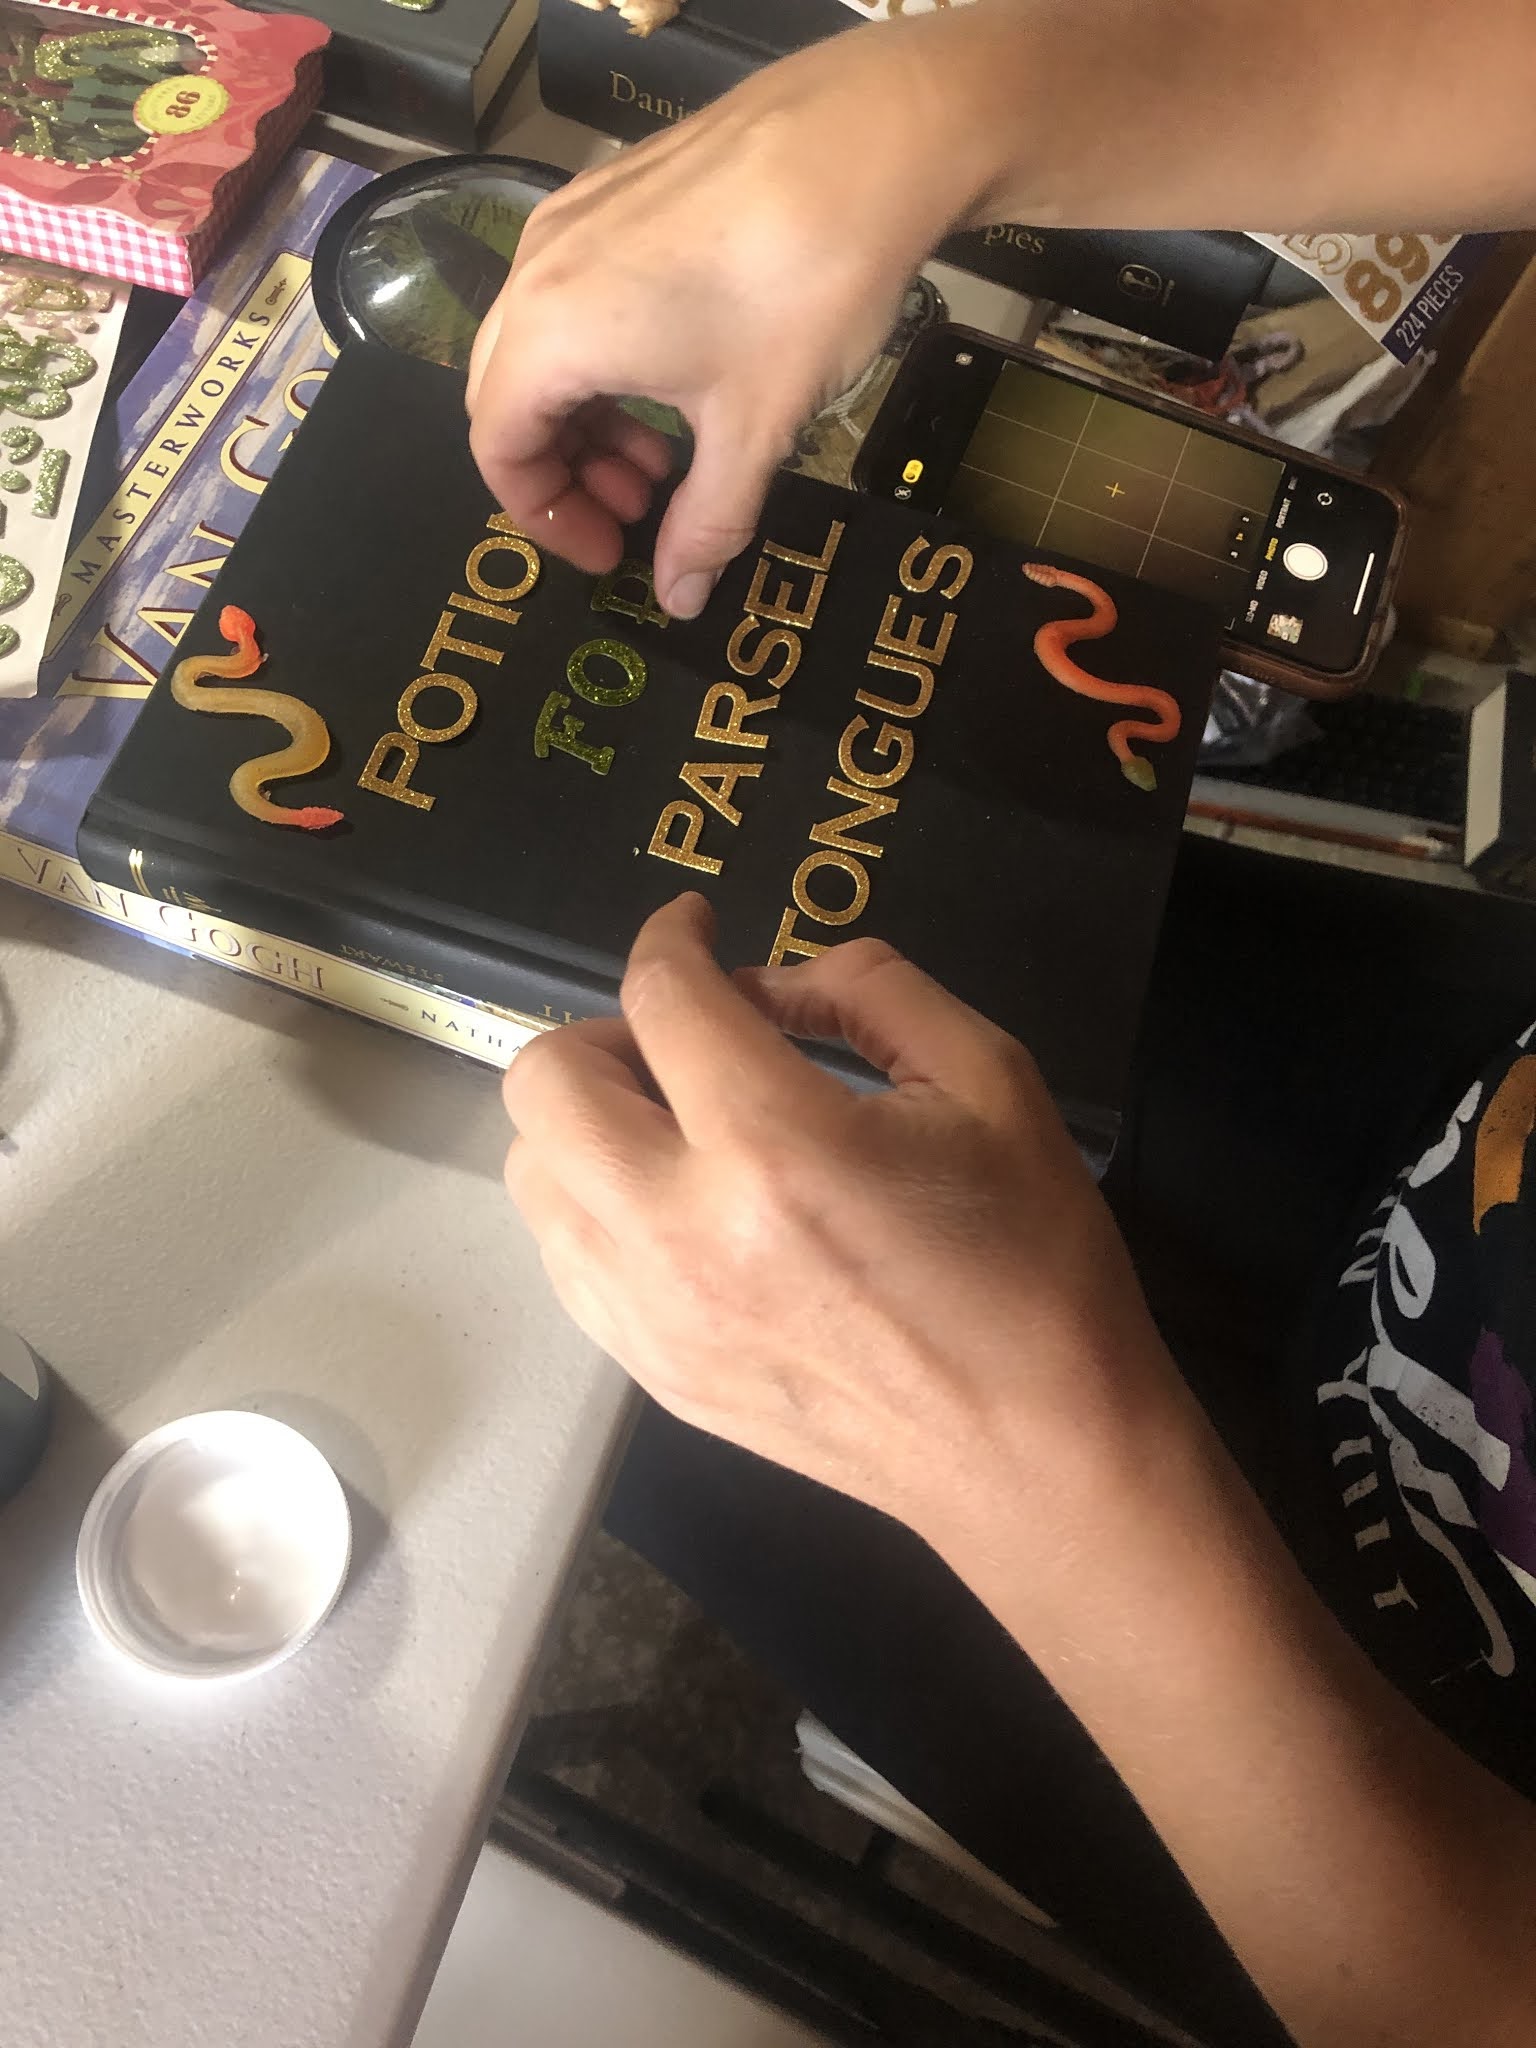
I first needed to grab some snakes (duh) and lettering that was a bit 3-D so that after it was covered, you'd still be able to see it.

After that we took paper towels, pealed them apart to make them 1-ply and got them just a liiiitle bit wet and laid them on top of the book. We then took Mod Podge and tapped, crinkled and smeared it with a small foam brush on top. We used disposable chop sticks to tap the paper towel around the lettering and decals we put on to make sure they wouldn't get lost under there. Here's Libby's dragon book during the paper towel process.

After that they sat to dry for quite a long while. At this time I decided to make more books cuz why NOT???


This modeling clay can be purchased from Walmart and has been used for so many transformations I've done. I love that it is easily manipulated and dries without cracking or coming apart. Even now, a week after using it the dragon scales are doing great!


I want to do more scales (even though I've already painted it black). It was my first time attempting this and even though I'm super proud of myself, I know I can do better. I'm even thinking of taking some of the alcohol colors you can buy that are transparent and adding the teal for a bit of dimension. I also want to add some grey or white to highlight a bit more. Basically it's a work in progress and I'm loving it! =)


Here's how Libby takes her books to the next level by adding inside pages. Click here to go to her tutorial for that and for how to stain the sides of your new spell book! So cool right??? Now, what book are YOU dying to make???
No comments:
Post a Comment