9/25/20

Haunted Picture Frame Wall


PARTY PHOTO BACKDROP
I always make sure to have a photo booth, or a photo station for my guests to take pictures in front of during a party. I try to have it in a room where there is enough light and room for small and big group pictures. For me, my makeup studio has always been the ideal choice. It is a blocked off room right when you come into the house off the the left. When the party starts, it looks like a haunted elevator and during and toward the end it's opened up so people can put their phones on a tripod, set the timer and take as many photos as they would like.

I've done a few backdrops that I've liked but NOTHING compares to the wall of haunted pictures with their bulky frames and 3-D effect. I have been gathering vintage type frames for years and it really came in handy when I saw this photo on Pinterest. I fell in love with the gothic feel and the layering of frame on frame on frame. Today I'm going to share with you exactly how I make my haunted frame backdrop. Enjoy!


MEASURING:

First I measured the wall and taped that exact measurement down on the living room floor. I then began stacking pictures, frames and photo backdrops (I found some at a party store to make up for not having enough to fill the whole wall just yet). Then I started stacking frames all over based on size, color and bulk. I LOVED having some odd shaped smaller frames toward the front to stack at the very end (on top of everyone else). Most of the frames did not have Halloween images in them so then I had to decide the type of feel I wanted to put up there. I think at this point I want to be sensitive that not all my guests would be okay with gore and gross Halloween so I tried to stay pretty safe. I myself don't love too much gore during Halloween and no, I repeat, NO clowns EVER!!!! We all have our limits LOL.

PICTURES TO USE/PAINTING FRAMES


I wanted to get old photos and vintage Halloween pictures. I found a few houses that looked haunted, black cats, vintage Halloween costumed children, old folks (that may or may not look spooky), haunted looking trees, dollar store images that change when you walk around them, potion bottles, books etc. Anything that speaks to your Halloween heart works. I was able to print out a ton at Costco relatively cheap and some were even HUGE! I made sure to only choose black and white photos to make big because it was cheaper.


I also busted out the gold, silver and black spray paint to give more interest and dimension to the wall. I didn't want all the gold to be too close to each other so when I was deciding which frames would be sprayed I first initialed them all while they were still on the floor. G for gold and so on.


PREPPING THE WALL:

While the frames were drying I took out the four or five plastic black tablecloths that I bought at the dollar store and began to staple them to the wall. The black covering would help make the whole wall look covered and fill in any space between the frames. It was super cheap and very easy to take down as well so I can keep using them every year.

HANGING THE PICTURES & FRAMES:


I'm not above putting holes in the wall so I busted out the hammer and nails for a lot of this. I suppose you could also use command hooks and booooooooy will you need a ton! I didn't attach the pictures to all of their frames but instead stapled the picture to the wall where it would go and placed the frame on top using a hammer and a nail. Measuring the picture and it's corresponding frame really paid off at this time. That way you didn't place the pictures too close together.


I absolutely LOVE how it turned out and can't wait to keep adding more and more frames. This was last years wall and I'll be sharing the NEW one with even more frames soon on IG. Happy Haunting!!!

9/24/20

Mandrake Garden


What is more magical than Harry Potter? I decided to add a few elements to my usual Disney's Haunted Mansion to include this mystical world. I had gotten quite a few dead trees for the front yard cemetery and in the pile I was searching through, I saw a few stumps. The stumps had the coolest, gnarled roots I had ever seen. I wasn't sure what I would use them for but I knew they had to be mine LOL.

I took them home and started on the dead tree project and then inspiration HIT! I would make a mandrake garden near my front entrance. Right on top of the wooly thyme and rocks I had leading to the front door. Because mandrakes are super hard to make, I figured I would do it a touch differently. I would make the tops visible with the branches and leaves, but have the underground plant/baby lie solely in the imagination of the passerby. How genius is that???


I took each twisted root cluster and began cutting them up and sectioning them off. I then used hot glue and fake leaves from an ivy strand I had and started gluing a few leaves here and there. I placed the roots where I wanted them and used painted dowels to hold them up. I painted them brown so you wouldn't see them and used fishing line to attach them together. 


I then took some of our extra foam and a paint stirring stick and made a sign to warn guests of the potential danger of touching the plants. The sign was made by my friend Libby using her Criket machine.


This craft is soooooo easy to do and can be used year after year! The way that I found dead trees and stumps was by going to various neighborhoods that were landscaped by the city or private developers. If they had dead trees that I knew they'd be replacing, I just called the city or company and asked for them. They are in a big pile in my backyard currently till we find a better way to store them LOL! Will you be making a Mandrake Garden this year???

9/21/20

Making Tombstones With Foam

This year we are focusing a lot more energy on the outside of the house than we ever have. Before, you would go past our house and you wouldn't even know that it was Halloween. I mean, walk IN and it was a different story but not on the outside. Last year we dipped our toes in by making our boarded up windows, dead trees and Mandrake garden.

The way we set up the trees last year was alright. We had set them up all along the hedge that made its way to the front entry. We basically held them up, used a piece of rebar to zip tie them to and voila! Well, you would think voila. The heavy winds we get and the weight of the trees proved too much for the rebar we bought. They leaned quite a bit and were very ready to be done after the season. This year we will 100% use super thick stakes so they will stand straight.


This time around we've decided to set the trees up all around and across the yard so as to make an amazing cemetery. The Springer Cemetery if you will LOL. Now, to have a cemetery the very FIRST thing you need are headstones. Today we'll be chatting about how we make them with insulation foam. Below is a step by step for how to make these awesome tombstones that will last AND stay put even with gusts of wind! 


We started with 3" insulation foam. We cut smaller blocks to make a bunch of tombstones. For this tutorial we will be going over the most basic of shapes. Kevin (the hubs) used some string that he anchored at the center point with his thumb. At the other end he had a pen and made the arch for the top of the tombstone.


He used a bandsaw to smoothly cut out the shape.


We then placed it on top of the piece that would be it's base and marked the spot with our pen so that we would know exactly where to spray our glue. After watching many tutorials and reading, we learned from our good friend Maureen that the 3M brand of glue was the best to use for keeping the foam pieces together. 


You spray BOTH sides. The bottom of the tombstone itself and the part it would adhere to. We waited 30 seconds to a minute before it was a little tacky and then stuck the two pieces together.


Worked like a charm! (UPDATE!!! Worked like a charm...until later. The 90 eats through the foam a bit so after a LOT of trial and error we recommend wither the 3M Super 77 or great stuff. You can get either the red can of great stuff or the blue, which is mostly used for doors and window casings. The blue won't expand as much but you need a way to clamp everything together or use wooden sticks to pin everything. We are using great stuff this year!)


Now THIS is the part that you want to pay attention to if you don't want to find your tombstones in the neighbor's yard. 
Kevin cut pvc pipe that was a bit longer than the length of his longest bit. He cut the ends at an angle using his bandsaw so that they would dig into the foam easier. (UPDATE: that didn't help as much as we thought, so no need to angle them.)


He marked where they would go in the foam.


Then he used his drill bit and going slowly he drilled the two holes. (UPDATE: after this season I realized that we didn't cut the pvc pipe long enough nor did we drill the holes long enough. Some ended up detaching from their foam base and fell over. Not all of them, but some. SO, I used my hot knife and went much deeper up into the tombstone, kept the same size pvc pipe but did loner rebar. Then I attached them back to their bases using great stuff. Let's cross our fingers for this season!!!)


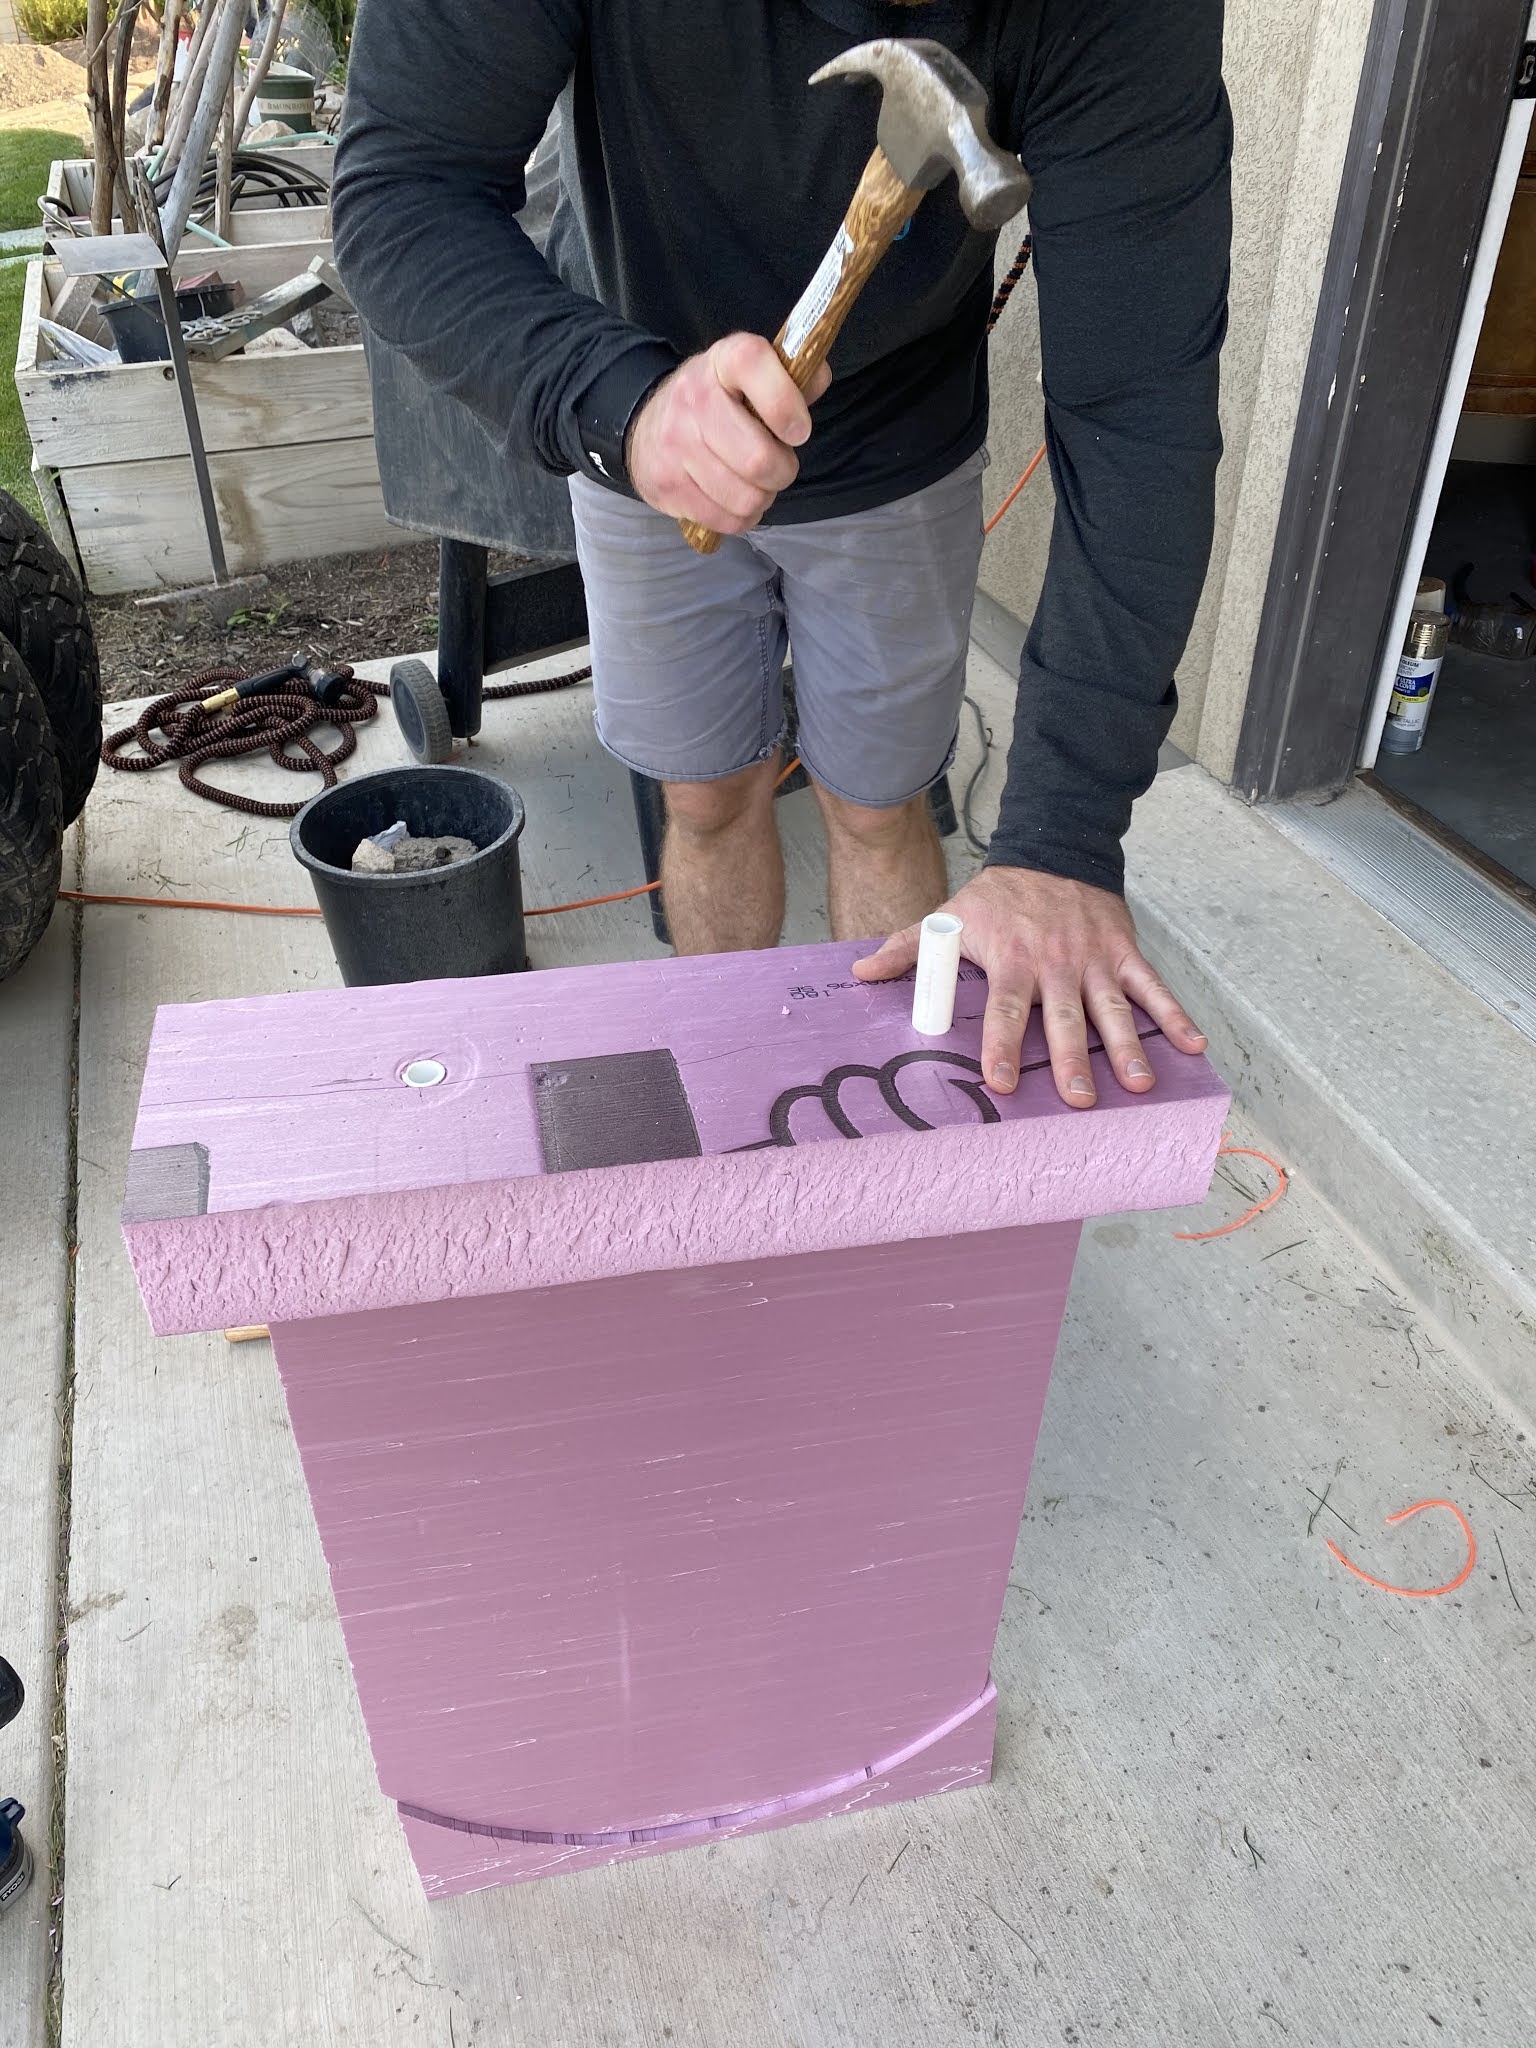
Next we took the pvc pipe and tried using a mallet to get them flush with the bottom of the tomb base. It didn't quite work as well as we would have liked. It got it in there but stopped at a certain point.


We then took a normal hammer and it worked perfectly!!!


It helped to add the piece of foam that we had originally cut off at the bottom. That way we had a straight surface to hammer into.


Next we went to the computer to pick out our tombstone person's name and any other details. I wanted BERRY M. DEEP with a fun little detail underneath it.


We then taped the lettering on where we wanted it to be and used a pen to outline the letters. We did this quite hard to make sure it left an impression on the foam.


Kevin then outlined the letters again just so it would be easier to see when he took the dremel to it.


We bought a When Dremel off Amazon years ago and just last week got a guard for it from Home Depot. We LOVE this guard because it makes every cut and every letter the same depth AND you can see exactly where you are cutting.


Once we finished the lettering we took one of the most amazing products I've been introduced to this last year.....DRYLOK. Oh can I just tell you how beautiful this stuff is? It completely seals and weatherproofs ALL your projects. We used this for our boarded up windows last year. 

Here is another tombstone we did for dear old Ichabod Crane.

Hope you enjoyed that!!! Be sure to send us pics if you do it too! =)

9/16/20

Halloween Wall Decor

This wall was SO much fun to put together....even though the hands took us a while to figure out LOL. 


If you want to know how to actually MAKE this wall, head over to Libby's tutorial over at the Cozy Coffin. She also has a tutorial on how to make these skulls that we put all over the wall. We first took the wall we made and laid it out on the floor the way it would be hung on the wall.


Then we placed all the Dollar Store skulls (after they had been cut, again see the tutorial here on Libby's site). Took a few trips to get them to the wall lol. 


It looks really good when you do a few singles and then some in clusters. 

Here's a video on how to attach them to the foam wall.


Lanterns and creepy hands went next JUST to see if I needed to move any of the skulls. We would be attaching only the skulls, then hanging the wall onto the wall (you following?) using 3M command strips. THEN adding all the other details.

We got our moss at a local craft store and only got one bushel per color. We just separated them and draped them over the skulls, added to the birdcages and stuffed into cracks.

I had random lanterns and birdcages around the house so I sprayed them the colors I wanted and strung them to the creepy hands that I purchased at At Home. I will say though, I was hoping that I could turn these hands upside down, or that they would be stronger to hold more (we had to jimmy rig the lanterns to stay on). Here are some other ones that are more "grabby" hands. I bought the light up lanterns from Walmart last season at the end of the year so this was the first time I was able to use them. I LOVE doing that!!!! Going to all the after Halloween sales and then feeling like it's Christmas opening up my bins each year....NEW STUFF!!!!! =)

 I also had some moss that I had purchased to make my own fairy garden houses. I glued those on to random spots and cracks and corners and I love the texture they gave! I grabbed some creepy cloth I had laying around and stretched it out till it was perfect to fit around some of the skulls. Throughout the years I will add more and more but I am pretty happy with how it's turned out for this year. What would YOU put on your wall?